
Embroidery bobbin thread tension is the force that holds the lower thread as it forms each stitch. Buyers control stitch quality by balancing bobbin tension with upper thread tension, then locking that setting in the machine log. When the two sides match, the stitch sits in the middle of the fabric and loops disappear. This guide explains how bobbin tension works, how to set it, and which fields to approve before bulk embroidery runs.
Key Takeaways
- Bobbin tension controls the lower thread, not the top thread.
- A balanced stitch shows no loops on either face of the fabric.
- Bobbin tension drift raises thread breaks on multi-head machines.
- Set the bobbin first, then fine-tune the upper tension.
- Log bobbin case weight and spring setting for every machine.
- Re-check tension when you change thread count or base fabric.
What Is Embroidery Bobbin Thread Tension?
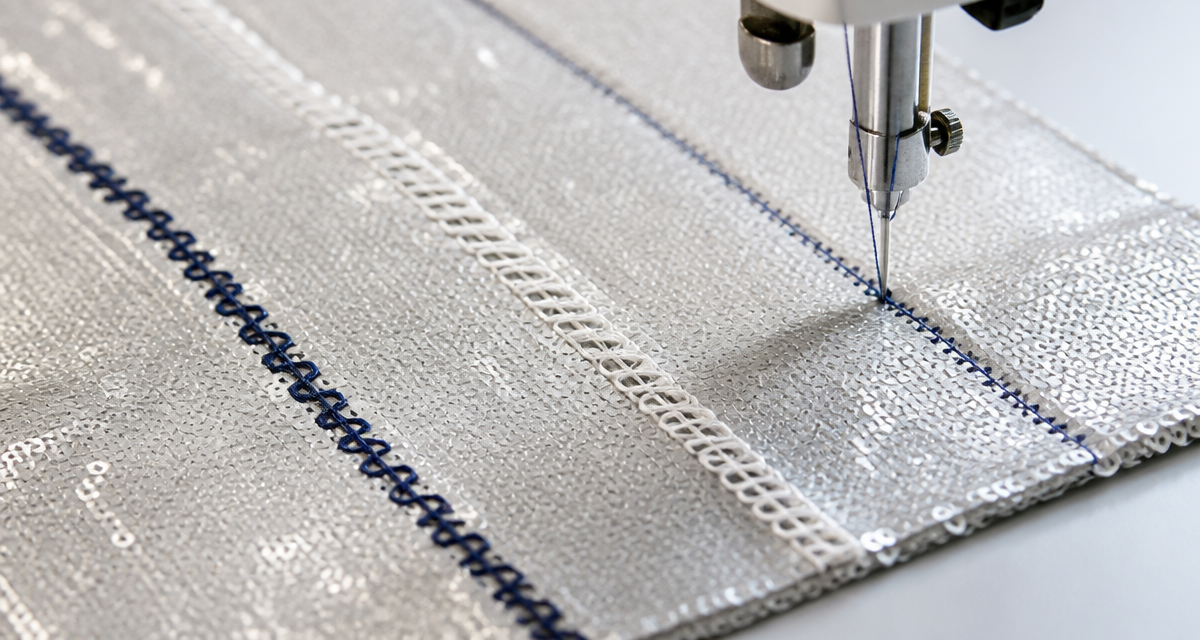
Embroidery bobbin thread tension is the resistance the bobbin case applies to the lower thread as it unwinds. A small spring on the bobbin case creates this resistance. Therefore, a slight turn of the tension screw changes how firmly the stitch locks into the fabric.
This setting works with the upper tension, which controls the top thread. If one side is too tight, the other side pulls the stitch toward its own face. Consequently, the stitch is only balanced when both sides share the load.
Why Bobbin Tension Balance Matters in Bulk Embroidery
Bobbin tension affects every head on the machine. On a multi-head unit, one loose bobbin can loop across hundreds of pieces before the operator notices. Moreover, a tight bobbin pulls the base fabric and creates puckering around dense stitching.
Breakage follows drift. In addition, the defect is often hidden on the back face, so it passes a quick front check. As a result, the fault reaches final inspection or the customer, and the order needs rework.
How to Balance Embroidery Bobbin Thread Tension: Step-by-Step
Work in a fixed order, and test on the real base fabric.
- Load the bobbin with the approved thread and check for even winding.
- Set the bobbin case to a light baseline tension with the drop test.
- Thread the machine and stitch a test motif on the production base fabric.
- Inspect both faces of the sample under bright light.
- Adjust the upper tension in small steps until no loops appear on either side.
- Repeat the test on every head of a multi-head machine.
- Record the final settings, then lock them for the run.
Comparison Table: Tension Symptom vs Cause
Read the symptom first, then correct the side that is out of balance.
| Symptom | Likely cause | Correction |
|---|---|---|
| Loops on the top face | Bobbin tension too loose | Tighten the bobbin case |
| Loops on the back face | Upper tension too loose | Tighten the upper tension |
| Puckering around the motif | Bobbin tension too tight | Loosen the bobbin case |
| Frequent thread breaks | Both sides too tight | Reset both tensions |
Procurement Checklist: Bobbin Tension Fields
- Bobbin thread type and count.
- Bobbin case reference and spring setting.
- Approved upper tension value.
- Base fabric used for the tension test.
- Machine speed during the test.
- Test sample reference.
- Re-check trigger for a new thread lot.
How Buyers Verify Tension with a Supplier
Ask the factory to keep a tension record for each machine, and to show the approved test sample. Then confirm the record matches the shipped goods. In addition, request a re-test whenever the thread supplier changes.
For related reading, see our guides on embroidery thread tension and embroidery thread breakage control. You can also review embroidery machine calibration to keep every head consistent.
Common Embroidery Bobbin Thread Tension Mistakes
Adjusting both tensions at once is the first mistake. When the operator turns the upper and lower dials together, no one knows which side corrected the stitch. Therefore, change one side at a time and test after every step.
Using the wrong bobbin thread is another common error. A lighter or heavier thread changes the tension balance, so the approved setting no longer holds. In addition, a poorly wound bobbin feeds unevenly and creates loops.
Ignoring the back face is a third mistake. Loops often hide on the underside, so a front-only check misses them. Consequently, inspect both faces under bright light before you approve a run.
Finally, many teams never reset tension after a thread change. As a result, drift spreads across the whole run before anyone notices, and rework follows at final inspection.
Bobbin Tension: Cost, Sampling, and Lead-Time Factors
Tension faults cost time, not material. A looping head can run for hours before the operator catches it, so the loss sits in rework and machine hours.
Sampling protects the run. When the factory records the approved tension on the real base fabric, every head can be reset to the same value. In addition, an early test avoids a late rebuild of dense motifs.
| Cost factor | Effect on price | Buyer action |
|---|---|---|
| Loop rework on motifs | High | Approve a tension sample |
| Bobbin thread waste | Medium | Standardise the thread count |
| Machine stop time | High | Log tension per head |
| Reject at final inspection | High | Check both fabric faces |
How to Run a Tension Trial Before Bulk
A tension trial is short, and it gives the run a stable baseline. Run it on the production base cloth, not on a stand-in fabric.
- Wind the bobbin evenly with the approved thread.
- Set a light baseline on the bobbin case using the drop test.
- Stitch a test motif, then read both faces under bright light.
- Adjust the upper tension in small steps until no loops remain.
- Repeat the test on every head of a multi-head machine.
- Record the final settings, then lock them for the run.
- Re-test after any thread or base fabric change.
Machine Room Conditions and Order Documentation
A stable machine room keeps tension consistent. Dust and heat change thread friction, so clean the tension discs and keep the room cool. In addition, replace worn bobbin cases before they cause drift.
- Bobbin thread type and count
- Bobbin case reference and spring setting
- Approved upper tension value
- Base fabric used for the test
- Machine speed during the test
- Approved test motif reference
Standard orders start at 200 yards per color, and the tension sample should be approved before the first bulk metre is stitched.
Working with a Supplier on Tension Balance
Ask the factory for a written tension record and an approved test motif. Then keep both in the order file so repeat runs match the same standard.
In addition, agree a simple re-test rule. When the thread supplier or the base fabric changes, run the motif again and re-approve it.
This small step protects multi-head machines, because one loose bobbin can affect hundreds of pieces in a single shift.
How to Compare Two Supplier Tension Records
Two factories can report the same tension number yet stitch differently. Therefore, ask both to test on the same thread count and the same base fabric. In addition, request the motif sample, not only the dial value.
A clear record lists the bobbin case reference and the spring setting. Moreover, it names the machine speed used during the test. As a result, you can repeat the setup without guesswork.
When the samples differ, check the thread first, then the bobbin case. A worn spring changes tension even when the dial stays the same. Consequently, replace worn cases before you compare results.
Final Tension Check Before Shipment
A last check protects the run. Stitch one motif on every head, then inspect both faces under bright light. Then compare each result with the approved sample.
- Bobbin case reference on the record
- Thread count and base fabric used
- Upper tension value and machine speed
- Motif sample per head
- Approved test motif reference
Source direct on Alibaba - request bulk pricing, specifications, and production details in one place.
View Yunfan Textile on AlibabaFAQ
What is a balanced embroidery stitch?
A balanced stitch shows no loops on either face. The upper and lower threads lock in the middle of the fabric.
Should I adjust the bobbin or the upper tension first?
Set the bobbin first, then fine-tune the upper tension. This order keeps the lower thread stable.
Why do loops appear on only one head?
That head has a different bobbin setting or a worn bobbin case. Re-test and reset that head alone.
How often should bobbin tension be checked?
Check it at the start of every run, after a thread change, and at fixed intervals during long runs.
Conclusion: Balance Both Sides, Then Lock the Setting
Embroidery bobbin thread tension decides whether a stitch sits flat or loops. Therefore, set the bobbin first, match the upper tension, and record the result for every head. Then bulk embroidery runs stay clean from the first piece to the last.
Request Sequin Fabric Samples
Send your fabric type, target GSM, color reference, and order volume. Our team will prepare a sample set for review before you commit to bulk.
Yunfan Textile B2B Contact
Contact: Morris
Email: morris@yunfantextile.com
WhatsApp: +86 156 3752 5803
WhatsApp: +86 175 1619 6727