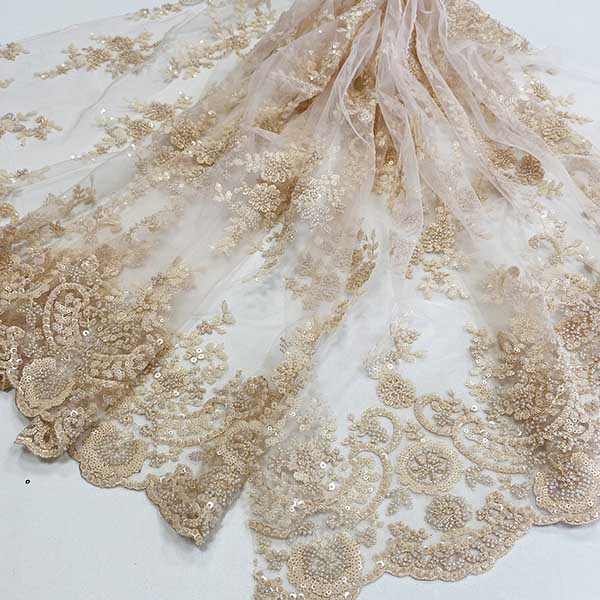

Embroidery motif placement is the agreed position, scale, and orientation of each embroidered element on the garment panel. It decides whether a motif sits balanced on the body, whether it crosses a seam cleanly, and whether two sizes of the same style still look like the same design. Placement is approved on a sample, and the approval must be specific enough that a production floor can repeat it without asking questions. This guide explains how to define placement, how to check it, and how to protect it across sizes and repeat orders.
Key Takeaways
- Define placement from a fixed reference point on the panel, never from a photograph alone.
- Approve placement on the real size and the real base fabric, because both change how a motif reads.
- Mark scale, rotation, and distance for every element, including repeats.
- Check how each motif behaves at seams, darts, and openings before bulk.
- Confirm placement on the smallest and the largest size, not just the middle one.
What Embroidery Motif Placement Defines
Motif placement is a set of measurements that locate each embroidered element on the panel. A complete definition states the distance from a named reference edge, the distance from a second perpendicular edge, the motif scale, and the motif rotation. The reference edges matter as much as the distances, because the same measurement from a different starting point produces a different placement.
Placement also includes the relationship between elements. A border sits at a defined height. A scattered pattern follows a defined repeat. A centre motif aligns to a defined axis. When the relationships are written down, the design survives size grading, marker changes, and repeat orders. When they are not, the design drifts one production run at a time.
Why Placement Drifts in Production
Four causes account for most placement complaints.
- Ambiguous references. If the instruction says centre, the floor must decide whether that means the panel centre, the body centre, or the visual centre after grading.
- Marker changes. A different marker layout moves the reference edge and shifts every measurement attached to it.
- Scale grading. If the motif scales with the size, its relationship to the panel edges changes, and the design can look heavier or lighter across the size range.
- Stitch density changes. Denser stitching pulls the base slightly, which moves the finished position of the element.
None of these causes is unusual. They become defects when the approval document does not describe what must stay constant.

How to Define Motif Placement for Approval
- Choose and name the reference edges, such as the left side seam and the hem line.
- Measure the distance from each element to each reference edge in millimetres.
- State the motif scale, and state whether the scale is fixed across sizes or graded.
- State the rotation of the motif relative to the reference edge.
- Describe the repeat, including the distance between repeats and the offset between rows.
- Mark how the motif should behave at seams, darts, and openings, such as stopped, mirrored, or continuous.
- Photograph the approved panel flat, with a ruler visible in the frame.
- Sign and date the sheet, and keep a duplicate with the sealed reference sample.
Step seven is the cheapest insurance in the whole process. A flat photograph with a ruler allows anyone to re-measure the panel months later without relying on a memory of the fitting.

Placement Comparison by Motif Type
| Motif type | What must be fixed | Common failure |
|---|---|---|
| Centred single motif | Axis and height from hem | Motif reads off-centre after grading |
| Border or band | Height from hem and band width | Band height moves when the marker changes |
| Scattered or all-over | Repeat distance and row offset | Visible pattern breaks at the seam |
| Corner or diagonal motif | Rotation and distance from both edges | Rotation mirrors on the opposite panel |
| Motif crossing a seam | Whether the design stops or continues | Half a motif appears on one side only |
Where a motif relies on stitch structure rather than position, confirm the construction first using the embroidery stitch density guide, because density sets how sharply the outline reads on the base.
Where Placement Approval Fails
Approving on one size only
A motif that balances on a medium panel can look low on a small panel and high on a large one. Check the smallest and the largest size and record both.
Ignoring the repeat relationship
All-over patterns need a defined repeat. The method in embroidery pattern repeat review before bulk production shows how to check that the repeat stays continuous across a seam.
Approving from a render
Digital renders help early discussions, but placement must be approved on stitched fabric, because the stitch changes how the eye reads the position.
Leaving the reference edges unnamed
An unnamed reference turns a measurement into an opinion. Name the edge on the sheet and mark it on the photograph.
Motif Placement Checklist
- Style code, size, and panel name
- Named reference edges, with a marked photograph
- Distance from each reference edge, in millimetres
- Motif scale, with the grading rule
- Motif rotation relative to the reference edge
- Repeat distance and row offset, where applicable
- Seam, dart, and opening behaviour
- Size range checked, including the smallest and largest
- Base fabric code and finish
- Approved by and date
Protecting Placement Across Repeat Orders
Placement survives a repeat order only if the approval travels with the order. Three habits make that reliable. First, attach the signed placement sheet and the ruled photograph to every purchase order, so the floor receives the same instruction as the first run. Second, ask for a first-panel photograph from each bulk run and compare it with the approved image before the balance of the order is stitched. Third, treat any change of base fabric, marker layout, or size range as a trigger for re-approval, because each of those changes moves the reference edges the measurements depend on.
These habits also speed up sampling. When the mill receives a placement definition that is complete, the first sample is usually close, and the discussion moves from where the motif should sit to how the surrounding finish looks. That shift saves a full sampling round on most styles. The same approval discipline is described in how to approve a sequin fabric sample before bulk production, where placement sits alongside colour, weight, and hand feel on one sheet.
Finally, keep the placement sheet in the same file as the colour and shrinkage records. One file per style, with one approval sheet per discipline, prevents the situation where a team can find the colour approval but not the position it was approved at.
Placement Tolerances and First-Panel Checks
Every measurement needs a tolerance, otherwise a perfectly repeatable design is rejected for a millimetre. Agree a tolerance in advance for each motif type and write it next to the measurement on the approval sheet.
Tolerance by motif size
Small motifs and fine repeats usually need a tighter tolerance than large panels, because the eye notices a shift more quickly when elements sit close together.
First-panel check on every bulk run
Ask for a photograph of the first completed panel against a ruler before the remaining panels are stitched. The check takes minutes and prevents a whole order from being stitched to a shifted reference.
Tolerance for seam behaviour
If the design is meant to stop at a seam, state how much variation is acceptable. A small overlap is often invisible, while a gap of the same size is clearly visible, so the two directions deserve separate limits.
Write the tolerances on the placement sheet, not in an email thread. The sheet is what the floor uses during production, and it is the document a quality check can measure against months later.
Frequently Asked Questions
Should motifs scale with garment size?
That is a design decision, and either choice works as long as it is stated. If the motif scales, check the smallest and largest size for balance. If it stays fixed, check that the motif does not crowd the smaller panels.
How precise does a placement measurement need to be?
Precise enough that two people measuring the approved panel get the same result. Most production teams work comfortably to the nearest millimetre on small motifs and the nearest few millimetres on large panels.
Can placement be approved from a photograph alone?
No. A photograph with a visible ruler supports the measurement, but the approval must include the stitched panel and the written distances.
What happens if a motif crosses a seam?
State in advance whether the design stops at the seam, mirrors, or continues. Leaving it open guarantees that the left and right panels will be handled differently.
Conclusion
Embroidery motif placement is a measurement problem before it is a design problem. Name the reference edges, write the distances, define the scale and the repeat, check the smallest and largest size, and attach a ruled photograph to the approval. Do that and the design holds still through grading, marking, and every repeat order that follows.
Approve placement on a stitched panel. Send your artwork, size range, and base fabric, then click Request Sequin Fabric Samples to receive a stitched motif panel with marked reference edges and measurements.
Contact: morris@yunfantextile.com
WhatsApp: +86 156 3752 5803
WhatsApp: +86 175 1619 6727